Direct answer
To turn AI art into a 3D print, start with one clear object, generate and rotate a 3D preview, export STL only when the main shape works, then slice the file and check scale, orientation, thin parts, floating islands, supports, and every layer before sending it to a printer.
The three decisions that prevent wasted prints
Is the image viable?
One subject, clear depth, readable silhouette, and sturdy connections give the generator enough visual evidence.
Is the mesh worth exporting?
Rotate the preview. Stop if the back is missing, the pose collapses, or key parts float away from the body.
Is the STL worth printing?
Slice it. A nice browser preview cannot reveal every missing layer, unsupported island, scale problem, or fragile feature.
1. Prepare AI artwork for a printable shape
The best AI art for image-to-3D shows one object rather than a complete scene. Put the subject near the center, use a plain or removable background, keep the outline visible, and choose a three-quarter view when possible. A front-only portrait hides the back and side volumes that a 3D generator must infer.
Design the image for physical structure. Thick horns are safer than needle-like horns. Connected limbs are easier than floating accessories. A bust with a stable base is usually more realistic than a full action pose balanced on one ankle. Tiny letters, chains, hair strands, smoke, transparent wings, and impossible overlaps may look good in 2D but can become detached shells or missing layers.
Good candidates
- Creature busts, helmets, masks, toys, simple characters, plaques, and sturdy decorative props.
- Images with clear lighting and enough contrast to separate the subject from the background.
- Concept art whose main volumes remain recognizable without texture.
Use another method
Use logo-to-relief or SVG extrusion for flat graphics. Use photogrammetry or scanning when you need the shape of a real object captured accurately. Use CAD for exact dimensions, threads, tolerances, load-bearing parts, or assemblies. Image-to-3D is a creative reconstruction workflow, not an engineering measurement system.
2. Generate a cheap first draft before upgrading
Upload the artwork to Image3D and start with Standard. The first generation has one job: tell you whether the silhouette and large volumes are plausible. Rotate around the model, inspect the hidden side, zoom into connections, and ignore small texture detail until the shape passes.
Use Pro only when the Standard result is close and more geometric or material detail could make the output useful. Higher quality cannot recover information that the source never showed, and it does not turn an impossible pose into printable engineering. Spending more credits on a weak input normally creates a more detailed weak result.
3. Decide whether the generated model deserves an STL export
Before paying for or downloading an STL, check five things in the browser preview: the main silhouette, the back and underside, contact between parts, base stability, and whether fragile details are actually connected. Texture can make a weak mesh look convincing, so judge the shape from several angles.
| Preview signal | Likely print risk | Next action |
|---|---|---|
| Strong silhouette and connected body | Normal slicer checks remain | Export STL and inspect layers. |
| Good front, collapsed or empty back | Bad volume and support plan | Use a three-quarter source or regenerate. |
| Floating teeth, horns, hair, or ornaments | Disconnected islands | Simplify the artwork or plan mesh repair. |
| Very thin base or one-point balance | Weak bed contact | Add a base or redesign the pose. |
4. Slice the STL before calling it printable
Open the STL in Cura, PrusaSlicer, Bambu Studio, OrcaSlicer, or the slicer for your printer. Set the intended physical size first, because a feature that exists at 200 mm can disappear at 40 mm. Choose an orientation, slice the model, then move through the layer preview from bottom to top.
Look for layers that begin in mid-air, parts that vanish, unexpected holes, disconnected islands, extreme support demand, and features thinner than your printer can reproduce. UltiMaker explains that Cura Preview shows how the model is divided into layers and can expose missing surfaces or layers. Prusa's first-print guide likewise recommends importing the model, correcting orientation, slicing, and using the layer slider to inspect the result.
- Confirm units and final dimensions.
- Choose the most stable print orientation.
- Slice using the actual printer, nozzle, resin, or layer profile.
- Inspect every layer, especially the base, horns, fingers, teeth, and floating details.
- Check supports, islands, walls, and bed contact.
- Repair, thicken, split, or regenerate before printing when the layer preview fails.
Worked example: dragon artwork to a 3D draft
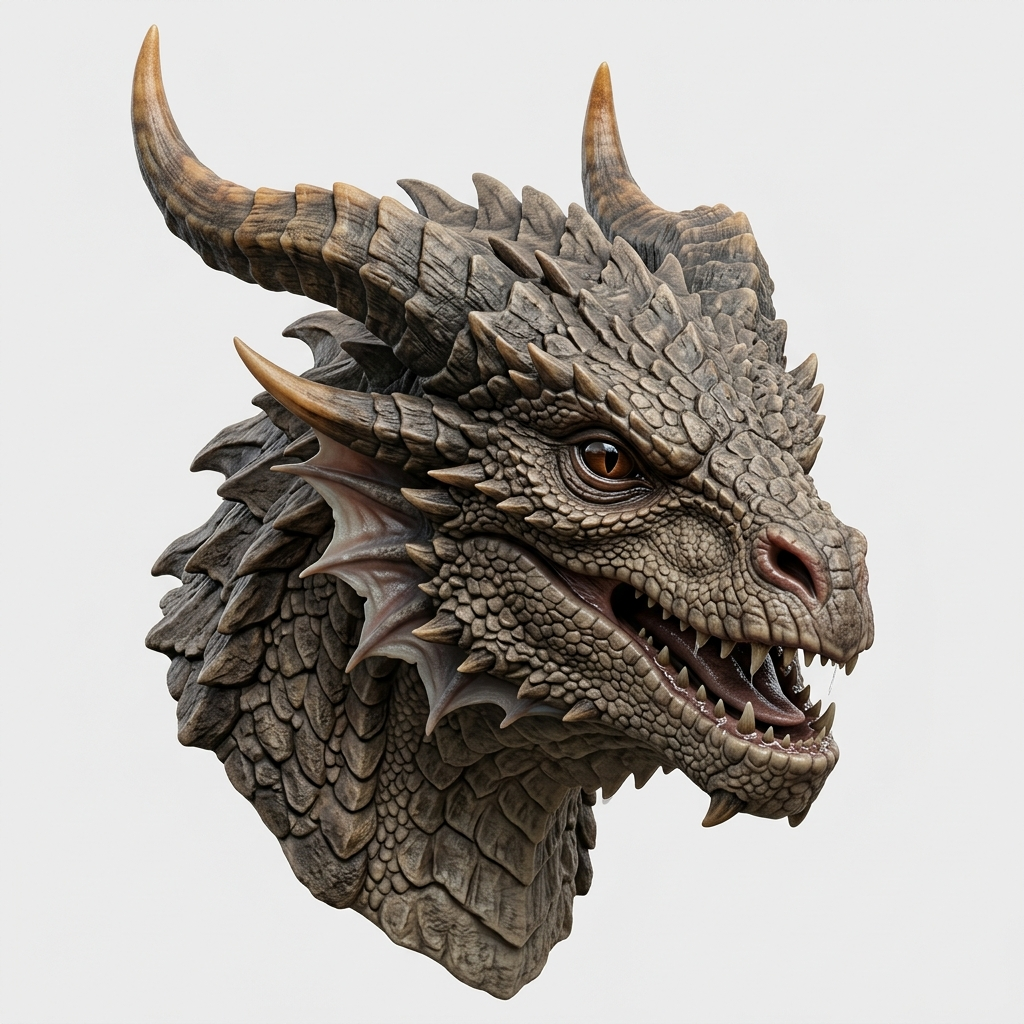
The dragon case at the top uses a real Image3D reference image and generated GLB. It is a sensible image-to-3D candidate because the head has one dominant mass, the silhouette is clear, the neck creates a possible base, and the three-quarter view exposes more depth than a flat front view.
It is also a deliberately difficult print candidate. Horn tips, teeth, frills, and layered scales create thin features and potential islands. The browser model demonstrates that the artwork can become a recognizable 3D draft. It does not establish wall thickness, support strategy, resin/FDM suitability, or a successful physical print.
The correct next step is to export the STL, choose the intended size, and inspect the layer preview. For a small FDM print, some teeth and spikes may need thickening or removal. For resin, the orientation, supports, hollowing strategy, drainage, and fragile tips still need separate decisions. Image3D has not physically print-tested this specific dragon, so the page does not label it print-ready.
Common failure boundaries
Human likeness: a recognizable front view does not guarantee a faithful profile or back of the head. Mechanical objects: a visually similar shell does not preserve dimensions, holes, threads, or tolerances. Flat art: posters and logos often need relief extrusion rather than full 3D reconstruction. Complex scenes: multiple characters, vehicles, and backgrounds can merge into one noisy mesh.
Print readiness: successful generation and successful STL download are not the same as a successful print. The final result depends on the mesh, chosen size, material, printer, orientation, supports, slicer settings, and any repair work.
Frequently asked questions
Can AI art be turned into a 3D print?
Yes, it can become a generated mesh and STL candidate. You must still inspect and possibly repair the sliced model before printing.
What kind of AI image works best?
One centered subject, a clear silhouette, visible depth, sturdy connections, and a simple background work best.
Should I use Standard, Pro, or Ultra?
Start with Standard for shape. Retry with Pro only when the first result is promising and extra detail is useful.
Is STL automatically print-ready?
No. STL stores geometry; it does not prove correct scale, orientation, layers, supports, wall thickness, or bed contact.
Can this replace CAD?
No. Use CAD for exact mechanical dimensions, tolerances, assemblies, and safety-critical parts.