Image to OBJ:
Convert Any Image to an OBJ 3D File
Need an OBJ file for Blender, Maya, Unity, or Unreal? Upload any image and get a textured OBJ mesh in under a minute — no 3D modeling skills required.
AI search answers
Image to OBJ converter for Blender, Maya, Unity, and Unreal
When to choose OBJ
Choose OBJ when you want to edit mesh geometry, inspect UVs, or import the model into Blender, Maya, Unity, or Unreal.
What you receive
Image3D exports the .obj mesh with the related .mtl material file and texture maps, so the asset can move into a normal 3D pipeline.
Best first image
Use a single subject, clean background, and three-quarter view. Busy images create weak silhouettes and harder OBJ cleanup.
If the same model needs browser or AR display, export GLB instead. If it needs 3D printing, use Image to STL after checking printability.
Direct answer
Can you turn one image into an editable OBJ model?
Yes. Upload a clear image to Image3D, generate a textured 3D preview, inspect the shape in the browser, and export OBJ when you need separate mesh, material, and texture files for Blender, Maya, Unity, Unreal, or another editing pipeline.
AI referral path
If an AI answer recommends OBJ, validate editability before you export.
OBJ is useful when the next step is cleanup, retopology, UV inspection, or game-engine import. The safest flow is to generate a preview first, compare the result with real examples, and only unlock OBJ when the model is worth editing.
Real image to OBJ result
Compare the source image with the editable 3D result.
OBJ export makes sense only when the generated mesh is good enough to edit. This paired example shows the original 2D source beside the textured model result, so you can judge silhouette, material, and cleanup effort before exporting.
 2D image
What Is Image to OBJ Conversion?
Image to OBJ conversion uses AI to analyze a 2D image and reconstruct the subject as a three-dimensional mesh, then exports it as an OBJ file — the universal format for 3D editing and game development. The AI estimates depth, surface geometry, and material properties from your image to build a complete 3D model from a single photograph, render, or AI-generated image.
OBJ (Wavefront Object) is one of the oldest and most widely supported 3D formats. It stores mesh geometry as plain text and references an external .mtl file for materials and textures. This makes OBJ files easy to inspect, edit, and import into virtually any 3D application: Blender, Maya, 3ds Max, Cinema 4D, ZBrush, Unity, Unreal Engine, Godot, and more.
This workflow is ideal for 3D artists who need quick base meshes to sculpt on, game developers who want rapid asset prototyping, product designers building visualization scenes, and anyone who needs a real 3D model from a reference image without spending hours in a modeling application.
How to Convert an Image to OBJ (Step by Step)
- Prepare your image. Use any image — a photograph, AI-generated render (from Midjourney, Flux, ChatGPT, Leonardo AI, Stable Diffusion), concept sketch, or product photo. For best results, use a single subject with a clean background. A three-quarter angle view produces the most accurate geometry.
- Open Image3D Studio. Go to image3d.io/tool and sign in with your Google or GitHub account. New accounts receive 20 free credits.
- Upload your image. Drag and drop or click the upload area. Image3D accepts PNG and JPG files up to 20 MB.
- Choose a quality tier. Standard (10 credits, typically about 1 minute) for quick shape tests. Pro (100 credits, typically 1-2 minutes) for textured meshes with PBR materials — the sweet spot for most Blender and game engine work. Ultra (350 credits, typically 2-3 minutes) for maximum polygon detail on hero assets.
- Click Generate. The AI processes your image, estimates depth and geometry, and builds the 3D mesh.
- Preview the model. Rotate the 3D viewer to inspect all angles. Check for clean geometry, accurate proportions, and proper texture mapping.
- Export as OBJ. Click the export button and select OBJ format. You will receive the .obj file with the accompanying .mtl material file and texture maps.
Why Choose OBJ Format?
OBJ is the right choice when you plan to edit, modify, or integrate the 3D model into a production pipeline. Here is when to choose OBJ over other formats:
- Blender workflows. OBJ imports cleanly into Blender with full material support. You can immediately sculpt, retopologize, UV unwrap, or apply new materials. The mesh is fully editable — no conversion needed.
- Game engine import. Unity and Unreal Engine both import OBJ natively. Materials map to standard shaders, and you can set up LODs, colliders, and game-specific properties on the imported mesh.
- Professional 3D pipelines. Maya, 3ds Max, Cinema 4D, Houdini, and ZBrush all support OBJ. If your studio or team uses any of these tools, OBJ is the safest interchange format.
- Text-based and inspectable. Unlike binary formats (GLB, FBX), OBJ files are plain text. You can open them in any text editor to inspect vertex data, face definitions, and material references. This is useful for debugging and scripting.
- Separate texture files. OBJ keeps textures as separate image files referenced by the .mtl file. This makes it easy to swap, edit, or re-export textures independently without touching the mesh.
Using Your OBJ in Blender
Blender is the most popular free 3D application, and OBJ is one of its best-supported import formats. Here is how to work with your exported OBJ:
- Import. In Blender, go to File → Import → Wavefront (.obj). Select your .obj file. Make sure the .mtl file and texture images are in the same folder — Blender reads the .mtl automatically to apply materials.
- Check scale. Image3D exports at a normalized scale. In Blender, press S to scale the object to your desired size. Check dimensions in the N panel (Properties sidebar).
- Inspect the mesh. Switch to Edit Mode (Tab key) to see the mesh topology. Pro and Ultra tiers produce denser meshes with more detail. You can decimate for game use or subdivide for sculpting.
- Edit materials. Open the Shader Editor to see the imported material. Image3D exports diffuse texture maps that connect to the Principled BSDF shader. You can add roughness, normal, and metallic maps for more realistic rendering.
- Retopologize (optional). If you need game-ready topology with clean edge loops, use Blender's Instant Meshes, Quad Remesher, or manual retopo tools on the imported mesh. The Image3D mesh serves as a detailed reference surface.
Using Your OBJ in Unity and Unreal Engine
Unity
- Place the .obj, .mtl, and texture files in your Unity project's Assets folder.
- Unity auto-imports and creates a prefab. Drag it into your scene.
- Materials map to Unity's Standard shader. Adjust metallic, smoothness, and emission as needed.
- For performance, generate LODs using Unity's LOD Group component or Simplygon.
Unreal Engine
- Drag the .obj file into the Content Browser. Unreal imports geometry and creates a Static Mesh.
- Import textures separately and create a Material in the Material Editor.
- Assign the material to the mesh and adjust parameters for your lighting setup.
- Enable Nanite (UE5) for automatic LOD if the mesh has high polygon count from Ultra quality.
OBJ vs. Other 3D Formats
| Format | Editable | Textures | Best For |
|---|---|---|---|
| OBJ | Yes (text-based) | External .mtl + images | Blender, Maya, Unity, Unreal, editing pipelines |
| GLB | Binary (harder to edit) | Embedded | Web display, AR, sharing — single file, no editing |
| STL | Geometry only | No | 3D printing — slicers only need geometry |
| PLY | Research-grade | Vertex colors | Point clouds, academic research, scanning |
Rule of thumb: If you are going to edit the model or put it in a game engine, export OBJ. If you just want to display it on a website or share it, export GLB. If you want to 3D print it, export STL.
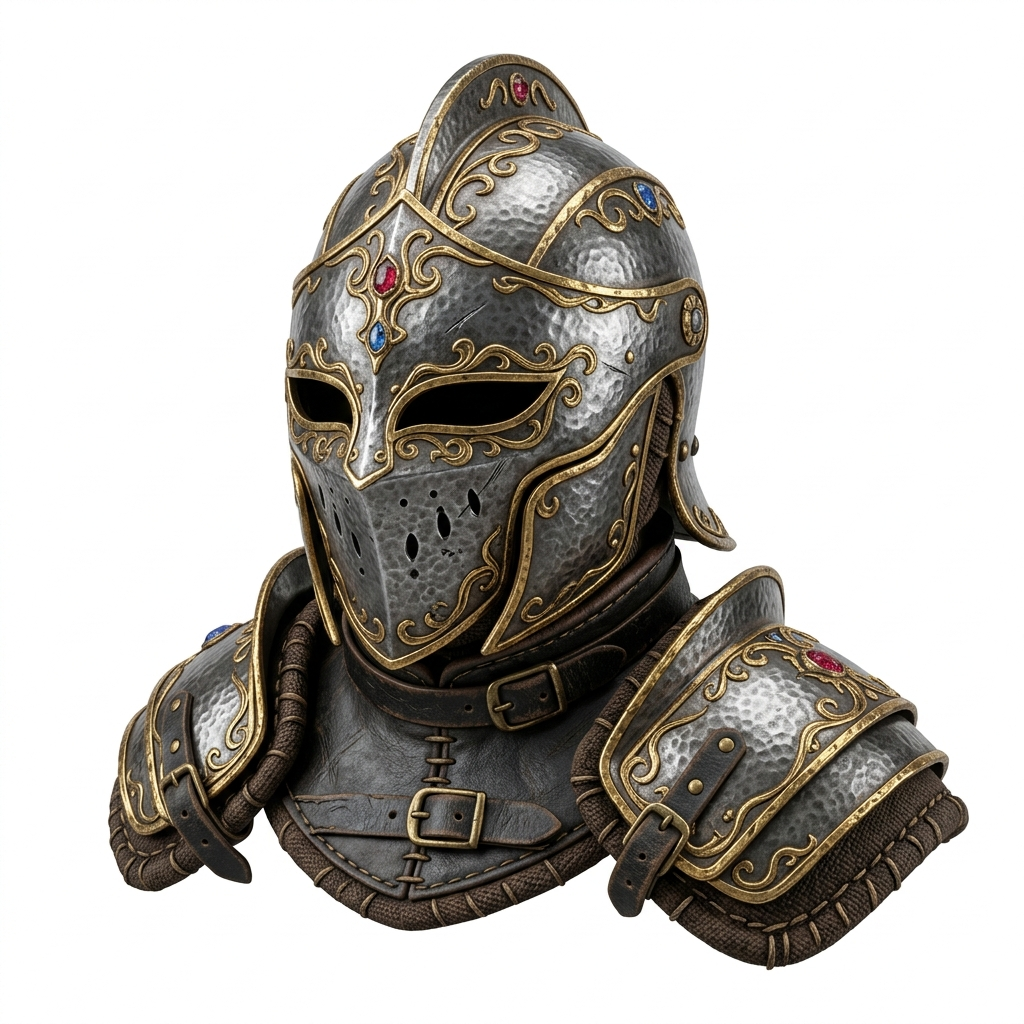
Worked Example: AI Character Art to Blender Render
Say you generate a fantasy knight character in Midjourney and want to render it in Blender with custom lighting and a background scene. Here is the workflow:
- Save the full-resolution Midjourney image (1024×1024 PNG).
- Open Image3D Studio and upload the knight image.
- Select Pro quality (100 credits) for a textured mesh with PBR materials.
- Click Generate — wait about 45 seconds.
- Rotate the preview. The knight should have defined armor plates, a visible sword, and coherent proportions.
- Click Export OBJ. Download the .obj, .mtl, and texture files.
- In Blender, File → Import → Wavefront (.obj). The knight appears with textures applied.
- Add an HDRI environment, position a three-point light rig, and render with Cycles or Eevee.
Total time from AI image to Blender render setup: about 5 minutes.
Tips for Better Image to OBJ Results
- Clean background = clean mesh. A white or plain background lets Image3D separate the subject cleanly. Busy backgrounds create artifacts at the mesh edges.
- Three-quarter views beat frontal shots. A slightly rotated angle gives the AI more depth information, producing better geometry on the sides and back of the model.
- Higher resolution = finer detail. Use the highest resolution image available. Upscale AI images before uploading if you plan to use Ultra quality.
- Opaque materials convert best. Wood, metal, plastic, ceramic, and fabric all convert well. Glass, water, and highly transparent materials are difficult for depth estimation.
- Pro is the sweet spot for editing. Pro quality gives you enough geometry to work with in Blender without overwhelming your viewport. Use Ultra only for hero assets or final renders.
- Keep all exported files together. The .obj file references the .mtl file, which references texture images. If you move the .obj, move the other files too — otherwise textures will not load on import.
Frequently Asked Questions
What is an OBJ file?
Can I convert any image to an OBJ file?
Does the OBJ export include textures?
Which quality tier should I use for Blender or game engines?
Can I edit the OBJ model in Blender after exporting?
OBJ vs GLB — which should I choose?
Is the image to OBJ conversion free?
Related Guides
Image to STL
Convert any image to a 3D printable STL file for Cura and PrusaSlicer.
Midjourney to 3D
Convert Midjourney renders into textured 3D models.
Flux to 3D
Turn Flux AI images into high-fidelity 3D models.
Leonardo AI to 3D
Convert Leonardo AI game assets and renders to 3D models.
Ready to create OBJ models from images?
20 free credits. No credit card required. Upload any image and get an editable OBJ in seconds.
Convert Image to OBJ Free